Friday 21 October 2011

Finally let's sort out that barnet!


Likewise with the eyes, hair is another feature that I have not yet modeled in 3DS Max. I hope to follow one of Studio Max’s own tutorials for this (I had learnt my lesson after the eye debacle!). The technique I decided upon using was to use the hair and fur modifier, attaching the hair to predrawn splines. I had assigned the hair and fur modifier to see what effect it had but this threw me a little (see below) and I decided that my best bet was to be deciding where the hair was to go before it went anywhere near the model.


These are images depicting my process in following the 3DS tutorial;


I created splines, like in the main model that connected to faces of the model. I selected view in active viewport so that they would be easier to see and manipulate.


Placement of the splines


Here you see the final Spline hair cage ready to be adorned with hair!

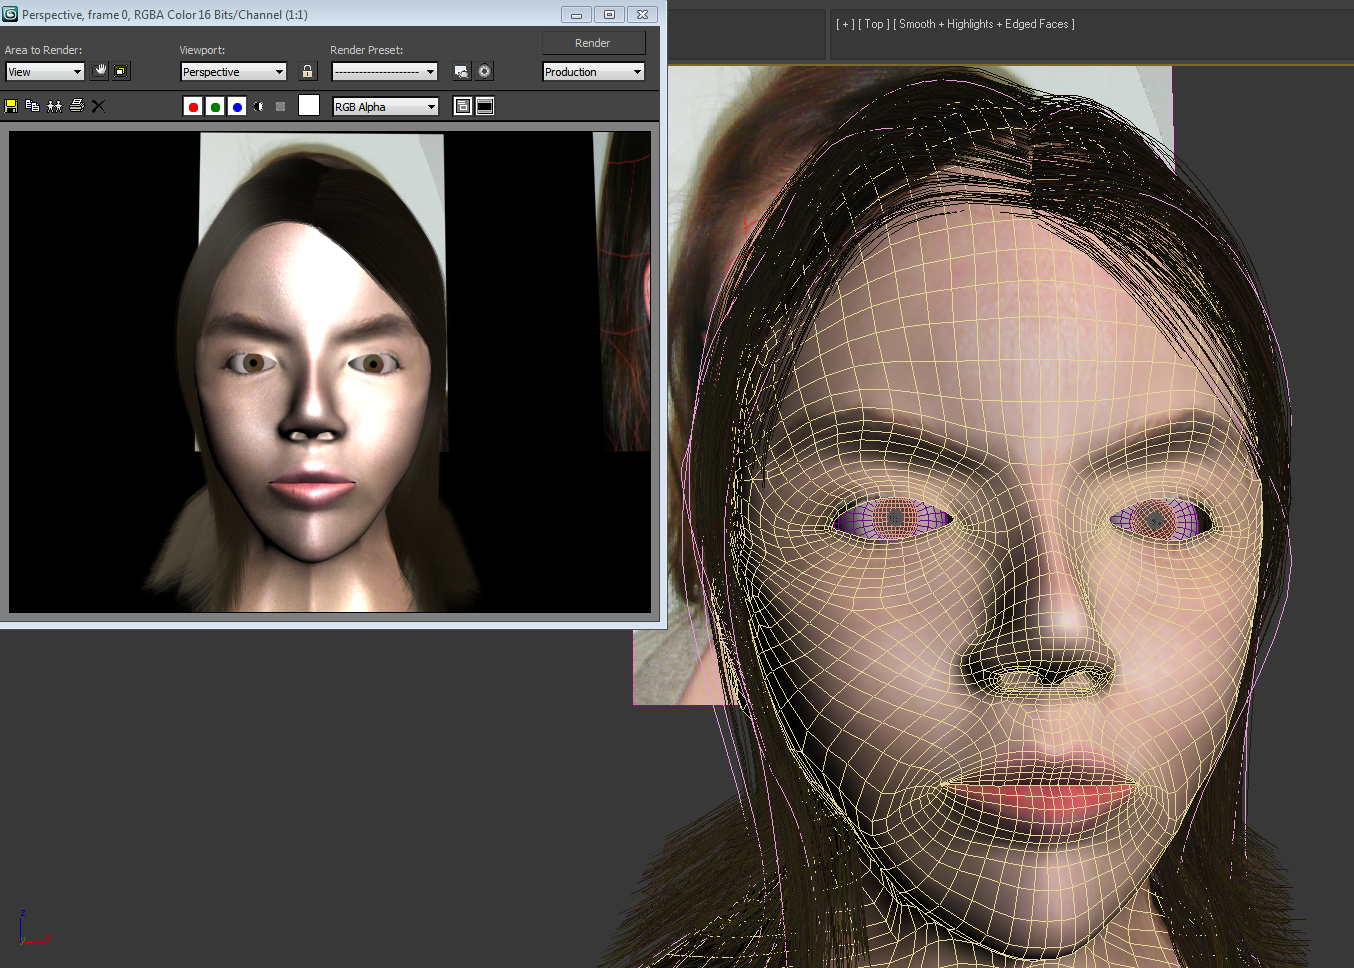
Next I added the Hair and Fur modifier, setting the hair count to 3000, segments to 100 and passes to 2. I changed the colour of the roots and tips and also manipulated some of the other options, checking the result in the render window to create the effect I was after. I also needed to go into the edit poly mode of the hair cage and manipulate some of the vertices into the correct positons to make the hair fall a bit better, which the following images depict. Whilst in the edit poly mode on the hair cage I noticed a few places I wanted to manipulate on the main head model also and so I went into the edit poly section of the main head and moved some of the offending vertices, such as again near the temple, removing unsightly bags under the eyes and around the neck. I took care not to change the head too drastically so as to alter the mapping too much.


The glossiness and spec values on this trial were a little high.


Here the hair looked too thin over the ear and so increased the hair count to counteract this


Still not quite happy with the hair and also the chin looks too narrow.

Finally I had a model that had a rough hairstyle similar to that in my original reference pictures, and also a finished head to match.


Virtual Polly


Eyes


Having never modeled an eye before I am just going to try my luck and see how it turns out as I really want to get onto the hair modifier as personally I think this will make more of an impact on my model if I run out of time.

Here are images depicting  how I created the eye;


Firstly I created a sphere and flattened one of the sides for which to attach the Iris and the pupil to. I then created the flattened sphere required for the iris.


Originally I had planned to select an eye bitmap from the Internet although I thought the for continuity’s sake I should use my own eye, or the iris colouring at the very least to match my eyes as closely as possible. As I said, this was my first time modeling an eye and perhaps in retrospect I should have researched a tutorial for this particular task.


I cut apart the eye image from my original reference photos and extended the white area of my eye and left a little pink around the edges for realism. I then tried to assign this bitmap as a material to the larger of my two spheres. This was problematic. The iris was stretched and distorted across the side of the sphere, with a gap at the back where the bitmap didn’t meet. I tried to rotate the iris into the correct position within the material editor, which was not as easy as I’d hoped creating the effect you see below, and so I tried a different tack.


I decided to cut the original image so that I had the iris and the white of my eye as separate Photoshop files. I then (using the clone stamp tool) enlarged the area of colour so that I could use it to fit onto my objects in 3DS Max as a material. Similar issues occurred as before although due to the bitmaps being largely one colour it wasn’t so imperitive to reduce stretching or requiring specific placement of images on the object. I added a pupil in the same manner and this is the end result of my quick fix eyes.


The eyes do bring the model alive a little more although if I have enough time at the end, they will be my number one priority to work on some more and to achieve a more realistic look. 


Specular Map


So it is time to create some natural shine and depth by creating a specular map to accompany both the skin colour and bump maps already assigned to the model.

This I created again, following the tutorial videos, which can be found here http://cg-india.com/tutorials/3dsmax_tutorials_organic_modeling.html This section is incidentally the final video that I would follow for this project.

Once again in Photoshop, as with the bump map, I copied the bump map layer and then I adjusted the levels of the image so that it was very dark, almost black. I created a new layer and painted in areas that would have higher specular values. Using lighten and the paint brush tool with a low opacity I drew/shaded areas that would be likely to be more naturally greasy or naturally shiny such as the chin, forehead, cheeks and eyes.


Using the blur filter on this image I manipulated the image using Gaussian blur, blending to get a smoother transition from the black areas to the lighter areas.


Final specular map


Here is the effect after being placed into the scene


I went into 3DS Max to check the allocation of my specular highlights. I found them a little harsh as you can see in particular in the close up view above. I returned to the specular map and toned down the transitions once again to create a more even tone. I also added the sandstone texturizer to add more detail to the model, especially when viewing up close.


This still looks a little shiny but I am happy enough for now, and may head back to manipulate this further if I feel it draws away from the final model. Luckily it is very simple to manipulate all three maps in Photoshop at any section of the project if required.

At this point I have come to the end of the tutorial videos. I could stop here as I have a decent model of my head although with no eyes or hair it feels dead. I therefore intend to create some eyes and use the hair and fur modifier in 3DS Max to create a feel of my hair.

Bump Map


After becoming a lot more satisfied with my new skin colour, I revisited creating a bump map for my model. This I produced in exactly the same way as the previous one although due to my colour map being a lot cleaner I found that this too worked better than previously.


The image above depicts my previous attempt at creating the bump map which clearly had a few anomalies. 


Here is the finished bump map, as you can see I added a little highlighting in Photoshop with the lighten, paintbrush and blur filter on the lips to give them a more realistic depth.


Without any manipulation, the bump map looked quite harsh when in a close up render view. To tone down the pores and harshness of the bump map I manipulated the noise parameters and mix.


Here is the final effect of the bump map after noise and mix manipulation.


Here We Go Again!

Back to unwrap UVW Modifier


Here is the model with the checkered pattern before editing the unwrap UVW modifier, and below you can see the difference after unwrapping, which is particularly noticeable in the ear pattern.


Here is my final attempt at the skin colour for my unwrap UVW modifier. As you can see by comparing it with the previous one I created, This one is a lot smoother and will hopefully look significantly better on my model than the previous one did (see below), without the need for too many adjustments.


I added a red colouring in the eye sockets and a darker skin colour to create a shadow within the nostril areas to add a little extra realism to the model within Photoshop.


Here is the result on the model


Adding Texture

Bump Map


The bump map aims to create a more realistic skin texture to the model. Using my previous UVW map that I created for the skin colouring of my model, I copied this colour map and turned it black and white. I created an even grey tone for the fill colour of a new layer, and then I changed the high pass of the image to 2.1, to create a rough texture for the bump map.


Due to the technical nature of this project it is essential to keep regular back ups of your work. If not, when your main USB device used for storage of files and images of 12 straight hours worth of work decides to corrupt for no specific reason you may find yourself in a bit of a pickle to say the least. If you hadn’t guessed of course this unfortunate event was another part of my journey along this project. I was not amused!


Thank goodness for Auto backup!


I decided that I would take this unfortunate incident and turn it to my advantage and have another go at creating the UVW map, bump map and tweaking the other issues in my project I wasn’t entirely satisfied with to create a better model in the long run.

Some obvious issues with my previous model and uvw map can be seen below in the corner of the eyes and also behind the ear


Do I have something in my eye?


And the ear too...